Servicing the Native Watercraft Slayer Propel Drive Unit
The Native Watercraft Slayer Propel Drive Unit is a great propulsion system for the kayak and was "First with Reverse". Occasionally the situation will arise where you will need either maintenance or repairs. Recently a customer brought us in a drive unit from an inherited kayak that had not been properly maintained and was in need of repairs. We will dive into this repair project and bring you along!
You will need a few tools to work on the Propel Drive Unit:
- 1/8" Allen Wrench
- 5/32" Allen Wrench (Provided with Kayak)
- 3/8" Allen Wrench (Provided with Kayak)
- Spanner Wrench (Adjustable)
- Flat Head Screwdriver
- Small Pick
- White Lithium Grease
- Rags
We first had to disassemble the drive to diagnose what kind of problems the customer was having and figure out what would be needed to put the drive back to like new condition. Since we had to tear down the drive completely there was no specific order to the process, but I chose to remove the crank/pedal assemblies first. This can be done with a Crank puller that is used for bicycles, we found one online that would do the job and not break the bank, once the Allen retaining bolts are removed. These can be tight, secured with LocTite, so use some leverage to help break them loose.
Next step is to use an adjustable spanner wrench to remove the Crank Side Cover Plates. These are also very tight, with the wrench in place you may need to give it a couple smacks with a hammer to break them lose.
NOTE: All of the hardware on the drive unit is standard thread direction EXCEPT the Spindle Lock Nut which is reverse thread.
When you pull off the Side Cover Plates the bearing may be stuck in them. If this is the case you will have to tap one of the covers off to separate the assembly to remove from the Upper Housing. Once we pulled this apart we could see that the drive had got water inside of it and had rusted out multiple bearings, in fact all of the bearings in the upper portion of the drive.

Close inspection also revealed that the Upper Gear had corroded and a few of the teeth looked pretty rough and knew it had to be replaced as well.

We now moved on to removing the 4 bolts from both the Upper and Lower housings to completely separate the unit. Each set of 4 bolts have a different head shape and need to be kept with the appropriate Housing. Bolt on the Left(Lower Housing) / Right(Upper Housing)

After separating the Housing we found that the water intrusion had also damaged the bearings in the Lower Housing and the Lower Transmission. With this we knew we would have to now replace all of the bearing in the complete drive unit along with all new seals, and the Lower Transmission.

Being a Native Watercraft dealer we were able to obtain all of the parts for this complete rebuild. With the list of parts needed and ordered, we now just needed to clean up the housing and get the Propel Drive Unit ready to reassemble. With parts in hand the reassembly was fairly straight forward.

I started with the Center Fairing and installed 2 new Upper Transmission Bearings, the Transmission Axle (18” Center Shaft), followed by the Upper Transmission Gear.

You now can flip the Center Fairing over and install the Lower 2 Transmission Gear Bearings followed by the Lower Transmission Gear.

Both the Upper and Lower Gears are secured with an Allen bolt, 1/8” Allen Wrench. The last thing is to install the new O-rings to the housing on the upper and lower sides where you installed the Upper and Lower Transmission Bearings. This will complete the assembly of the Center Fairing section.
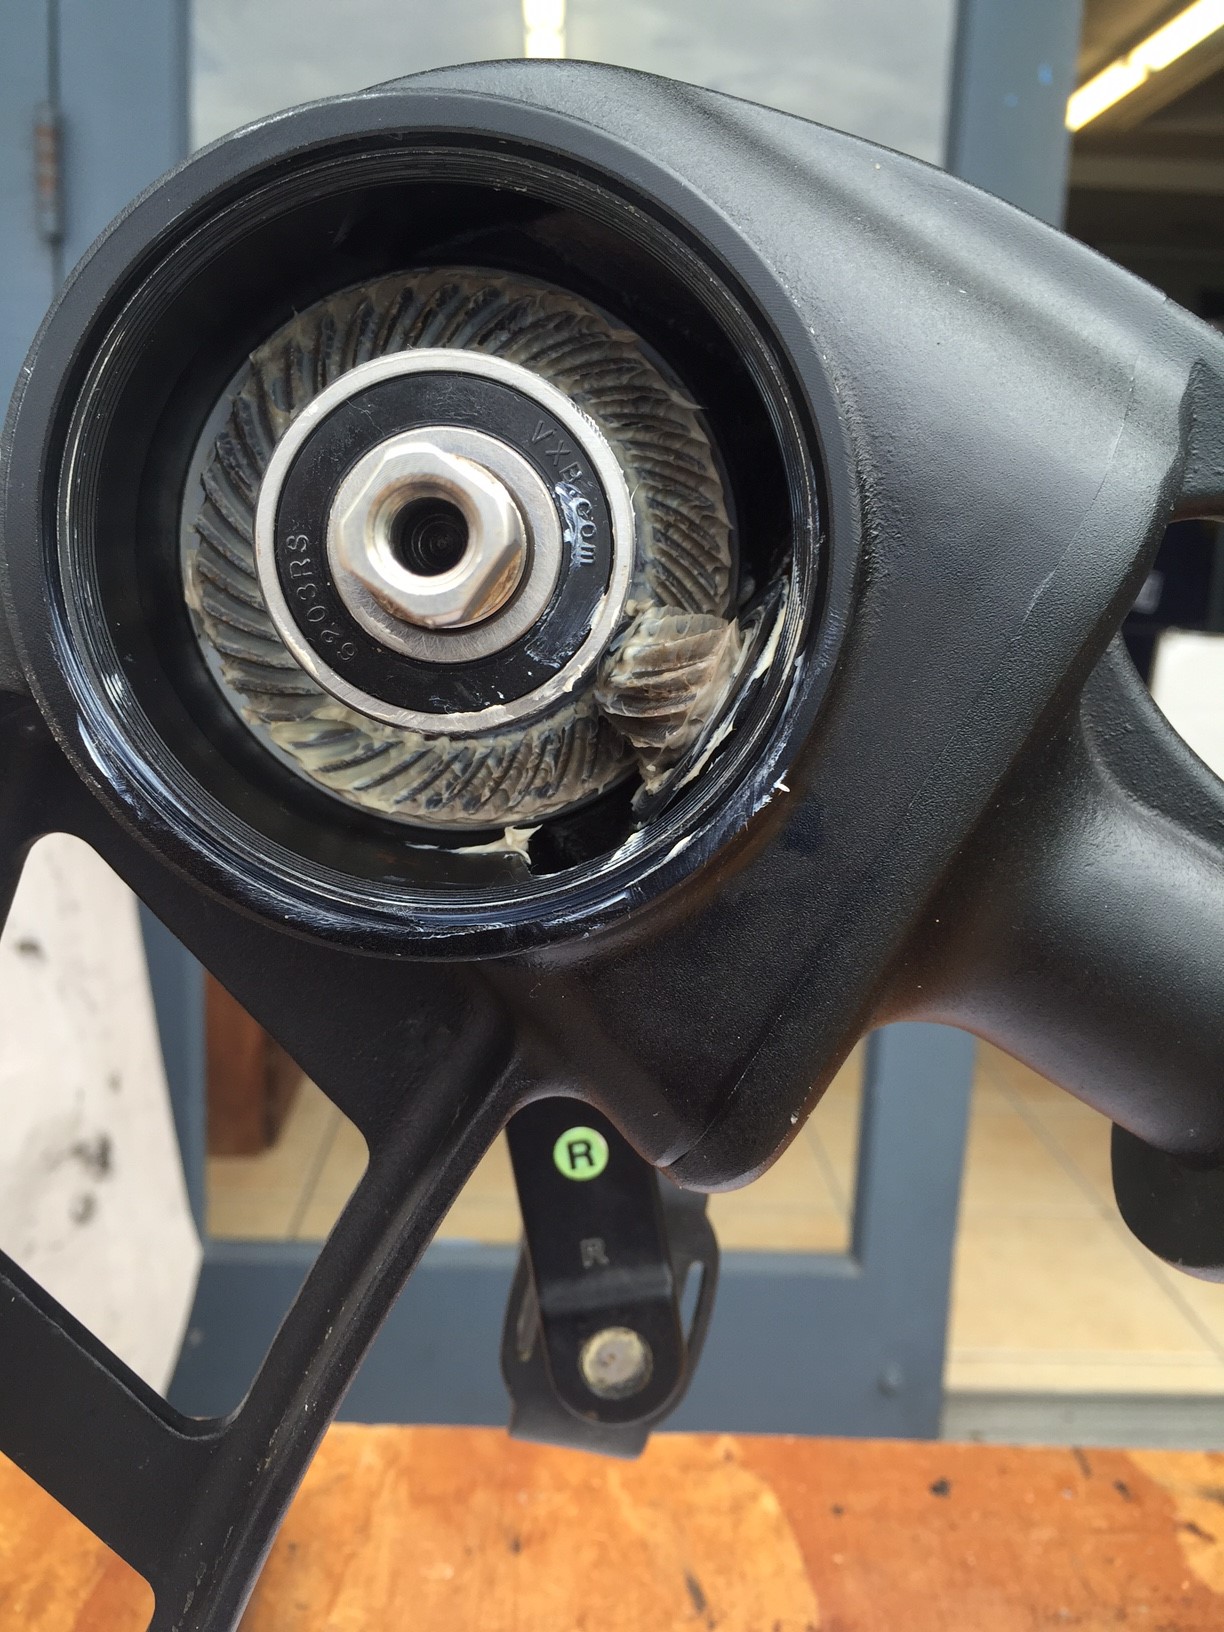
We know move to the Upper Housing components. Look at the Side Cover Plates and locate the right and left sides. The LEFT Side Cover Plate is the one with the Lubrication Screw Port.

On the Crank Spindle; installed 2 new O-ring Seals on the left and right side shafts followed by the Upper Crank Gear. New Side Cover Bearing were next, left and right side. On the Right side, as designated on the Crank with the “R” sticker and from the seated position looking forward, the Spindle Locknut needs to be tightened down. Remember that this is a reverse thread nut! With these pieces all put together I apply the White Lithium Grease to the Upper Gear.

Now I slide the assembly through the Right side and line up the Crank Gear with the Upper Transmission Gear. With these gears meshing, you can tighten down the Right Side Cover Plate using the spanner wrench. You need to make sure that the O-ring Seal on the Side Cover Plate does not get pinched as you tighten the plate down. I applied a small amount of grease to help it slide into place.
Making sure you have enough grease on the gears, next install the left Side Cover Plate. Very important to tighten both Left and Right Side Cover Plates

until flush with the Upper Housing to insure a water tight seal.

I chose to install the Cranks at this time making sure to put them on the appropriate sides as marked, “L” & “R”. Tighten down the Crank Bolts fairly tight, I have had these come loose when out on the water. Because of this I always take the Crank Bolt allen wrench with me out on the water.

The Lower Assembly has much less to do as the Lower Transmission Assembly comes from Native Watercraft as an assembled unit, you just need to make sure you install the O-ring seal over the end of the Assembly and slide it towards the threaded end. Install the Lower Shell to the Center Fairing, using the correct bolts in case you install in a different order than we are here. Make sure to install the Lower Shell Gasket, between these parts, if you had to remove or replace this part on disassembly. (PICTURED BELOW)

Be careful not to damage the O-ring seal on the Center Fairing. I applied a small amount of grease and slid it into place carefully. I also used a small pick to keep the O-ring in place because it wants to move around quite a bit.

After all three major parts of the drive unit have been assembled, apply grease to the Lower Transmission Gear and the Propeller Gear. Now you can insert the Lower Transmission assembly into the Lower Shell, making sure to line up the gears as you did on the Upper Housing.

Tighten the Lower Transmission Assembly into the Lower Shell, making sure that is flush as to make for a water tight seal. Install the Shear Pin and then place the Propeller over the shaft until it slides down over the shear pin, tighten the Propeller Bolt.

As I have done throughout the process, crank/spin the drive to make sure there is no binding and everything feels/sounds good. If so, which in this rebuild was the case, you are all done!

With the proper maintenance this major of a rebuild can be avoided and save you quite a bit of money and time off the water. We at KayakFishingSupplies are definitely able to service your Native Watercraft Slayer Propel Drive units from the routine to the major rebuild. Have questions, give us a call and we will be glad to help you out.